This post is a documented journey about creating a completely portable version of OSRS that can be played from a USB flash drive. When embarking on this project I set the following requirements:
- Install a portable version of Java (JRE) on a USB thumb drive so that Java does not need to be installed on the host computer
- Configure the OSRS client (either the official client or RuneLite) to store all data (primarily the cache and any other files) on the USB thumb drive
- Implement an easy method to start (run) the OSRS client from the USB thumb drive
- Do not leave artifacts (e.g., files) on the host computer
You might be asking why would anyone want to do this? There are a few reasons, but the most logical reason is when you have a computer where you cannot install additional software. This makes it difficult as Java is required to play OSRS, as well as the client - both require installation! And the Java install requires administrative rights to install. Anyway, I personally do not really have a reason to do this, but I am always up for a new challenge! This post was written and tested on Windows 10, but the general methods should be transferable to other Windows versions and Linux-based systems.
Contents
- Requirements
- Installing a Portable Java Runtime Environment
- Creating a Folder Structure
- Using the RuneLite Client
- Using the Official OSRS Client
- Conclusion
Requirements
I expect you have the following requirements if you want to follow this tutorial:
- A USB flash drive (pretty much any size, the method uses about 200 MB of disk space)
- A Windows computer to set up the portable USB flash drive with Internet access!
Installing a Portable Java Runtime Environment
The first step to getting a fully portable OSRS client is to install a portable version of Java on a USB flash drive. This was a difficult part of this project as there is no option available from Oracle (official developers) to have a portable Java environment. I have written this before in other blog posts - but to run Old School RuneScape (OSRS) you need to have the Java Runtime Environment (JRE) installed. You can also use the Java Development Kit (JDK) which is used for building Java applications - as it comes shipped with the JRE. So… we must have a portable version of the JRE as a minimum requirement.
After a lot of research and some testing, I found the following solutions to installing a portable JRE on a USB flash drive:
- jPortable from PortableApps: A version of the Java Runtime Environment (JRE) created and distributed by PortableApps. The entire goal of the PortableApps project is to provide portable versions of application/software that would usually require you to install them. They have lots of options for Java: the JRE or the JDK, both in 32 and 64-bit variants.
- java-portable by Vinetos: A GitHub repository that has a PowerShell script to automate the process of creating a portable JRE or JDK on a USB thumb drive using the official JRE installers.
- Tutorial how to create a portable JDK: This looks very similar to the method as implemented in the
java-portablePowerShell scripts.
With the options available I decided to go with jPortable as it seemed the easiest method. I did try creating my own portable version of the JDK which was not too difficult… however, compared to the automated installer provided with jPortable it was much more time-consuming and probably difficult for most users.
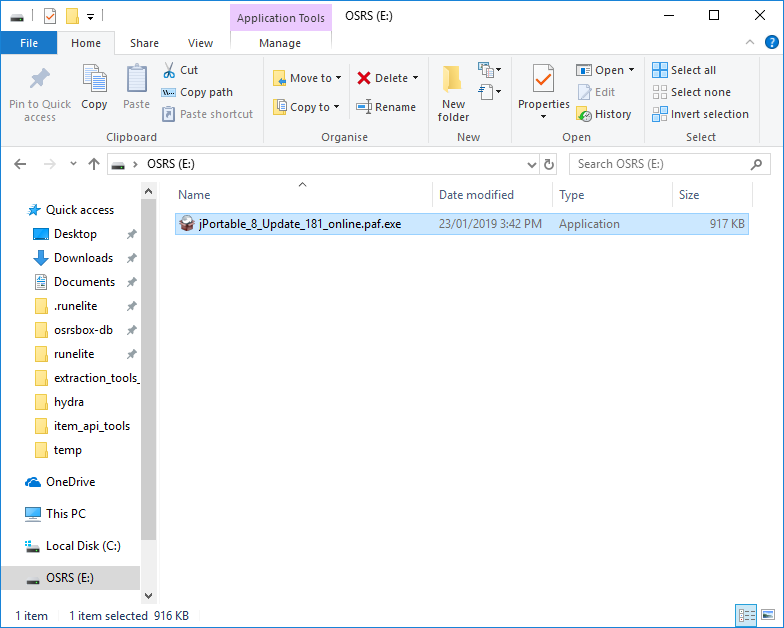
I started by downloading the jPortable 32 bit installer file from PortableApps. Then I copied the downloaded installer file named jPortable_8_Update_181_online.paf.exe to my USB flash drive. I have so many flash drives laying around that I used one to make a dedicated device for my portable OSRS client. However, you could use a USB flash drive with other data on it.
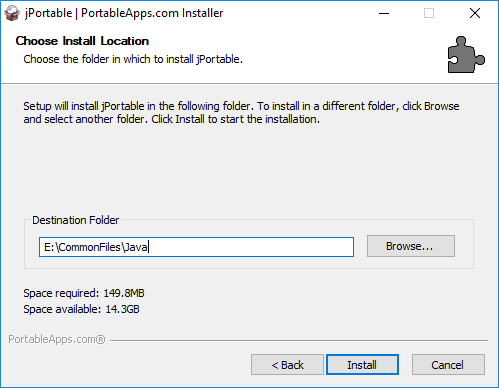
The install of jPortable is really simple - this is the main reason that I chose this software. Simply run the installer and it will download the JRE from Oracle and extract it to the USB device. The only part of the installation wizard process you need to check/modify is the installation path to ensure it is pointing to the correct install location. By default it should detect your USB drive if you are running the installer from the USB device. In this tutorial, my USB drive was mounted to the E: drive, so the default install location should be E:\CommonFiles\Java, as displayed in the image below.
After the install has finished, navigate to the CommonFiles\Java\ directory to make sure all the files have been installed correctly. It should look like the image below.
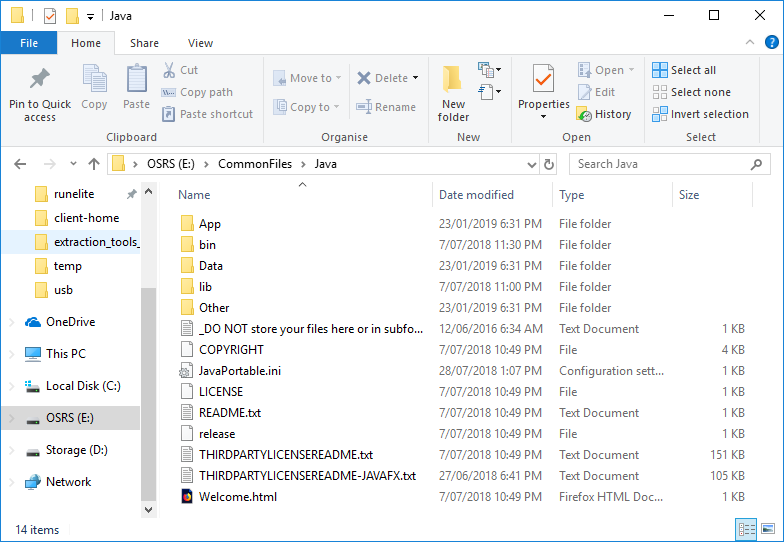
The most important part of the JRE installation is determining where the java.exe file is located. We need this file to run any compiled OSRS clients - the JAR files. For the jPortable install, the java.exe file will be in the following location:
CommonFiles\Java\bin\java.exeNow that we have a portable version of the JRE installed on our USB flash drive we can investigate how to get the OSRS client on the USB drive, and more importantly… how to run the client using our portable JRE. We also need to determine how we can save the client files (cache) to the USB flash drive. We will investigate two clients, starting with RuneLite (it’s first because it’s awesome!) and then the official OSRS client.
Creating a Folder Structure
I like things neat and organized - so I created a suitable folder structure for the portable OSRS client project. I created the following folders in the root directory of my USB flash drive. Each folder has a specific purpose:
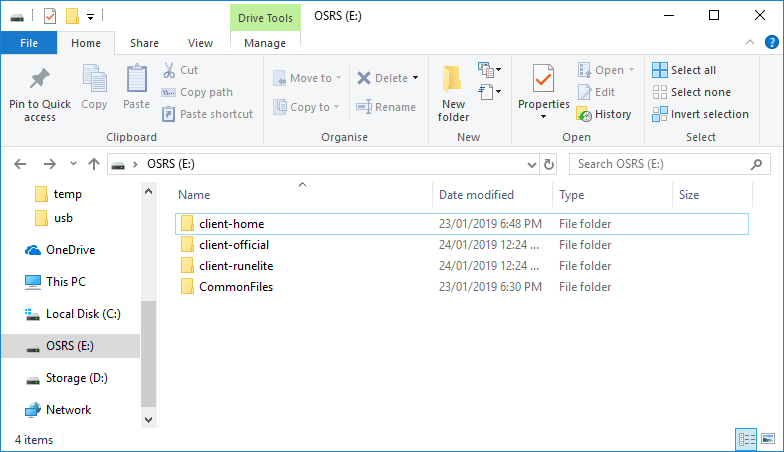
client-home: The purpose of this folder is to replace the usual home directory of a user (e.g.,C:\Users\PH01L\). This folder will contain the OSRS cache. When using RuneLite, it will also store the RuneLite home directory instead of the usual location (e.g.,C:\Users\PH01L\.runelite\).client-official: The purpose of this folder is to store the executable JAR file and icon image for the official OSRS client.client-runelite: The purpose of this folder is to store the executable JAR file for the RuneLite client.
You are welcome to change the folder structure, however, please note that the remainder of this tutorial uses the folder structure I have specified above. Therefore, you will have to change some of the commands based on how you change the folder structure. At the end of this step, we have the following folders as displayed in the image below.
Using the RuneLite Client
So far we have set up a USB flash drive with a portable version of the JRE, and set up a folder structure for the data we want to store. In this section, we set up the RuneLite client to be run off the USB flash drive. This actually ended up a little more complex than I thought it would - primarily because it was difficult to get the RuneLite client to reference a different folder for the OSRS cache files. In this section, we will look at the method used to download the multiplatform version of the RuneLite client to avoid installation, then cover how to run the client directly from the USB drive.
Download the RuneLite JAR File
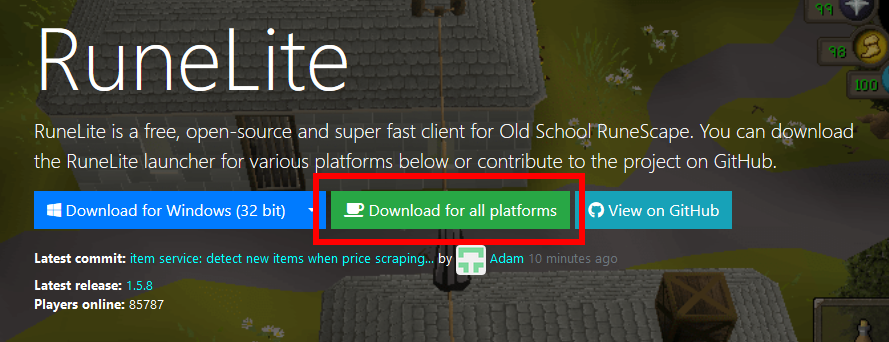
To run the RuneLite client from a USB file we need to get the executable JAR file - the version that is for all platforms. This is a JAR file, named RuneLite.jar. You can easily download the RuneLite.jar file from the official RuneLite website. Just select the Download for all platforms button on the RuneLite website, as shown in the image below. However, I like to download my files from GitHub…
I think that there is a huge benefit from downloading any RuneLite files from the official RuneLite account. My main reason for this is that they provided the hash values for RuneLite launcher downloads. With the number of dodgy websites and scamming, I feel it is better to be safe than sorry. The RuneLite project has a dedicated GitHub repository for the launcher. FYI - the launcher is used to run the RuneLite client and update the dependencies. In the RuneLite launcher repository, there is a releases section with downloads. As a side note, the official RuneLite website links to these same files, but in the GitHub repository, they list the hash values for the downloads. Excellent! Basically, you can download the required file, then check the hash value against the hash value provided. Data integrity!
The steps required… Navigate to the releases section in the RuneLite launcher GitHub repository. Click the link named RuneLite.jar to download the file. An image for reference is provided below. When I downloaded the RuneLite.jar, I used version 1.6.1 of the launcher - the newest release will always be the first section listed on the page.
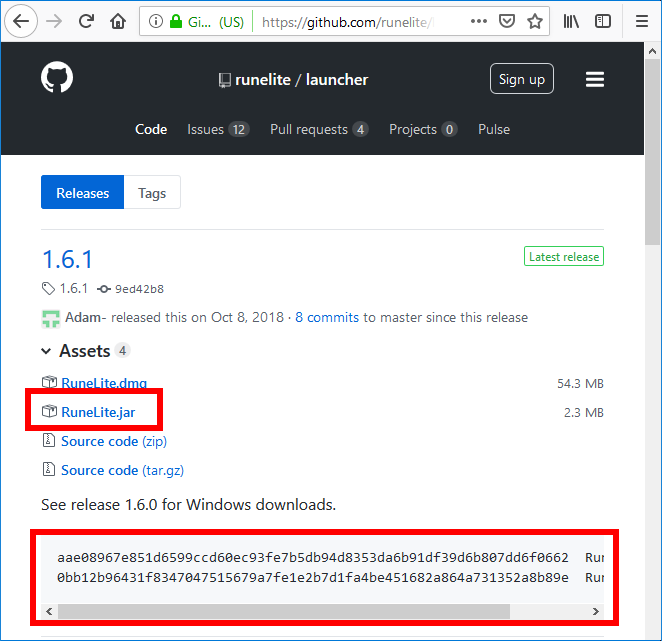
When you have downloaded the file, it makes sense to calculate the hash value… this is done to check the integrity of the downloaded file. Hashes are kind of like fingerprints, a hash for a file should never change. So we can calculate the hash to determine if the file we have downloaded has the same fingerprint as what the RuneLite developers have provided. We can easily check the hash value in Windows using PowerShell. Load up PowerShell, make sure you are in the same directory as where you downloaded the RuneLite.jar file, then run the following command:
Get-FileHash -Algorithm SHA256 .\RuneLite.jarVersion 1.6.1 of the RuneLite launcher had the following SHA-256 hash value.
aae08967e851d6599ccd60ec93fe7b5db94d8353da6b91df39d6b807dd6f0662However, if you download a different version, the hash value will be different. Make sure you check the hashes are the same!
The last step… copy the RuneLite.jar file to your USB flash drive. Based on the folder structure I configured, I will save the file in the client-runelite directory. In my case, I copied it to the following location (where E: is the drive letter of my USB flash drive):
E:\client-runelite\RuneLite.jarRunning the RuneLite JAR File
UPDATE: Please note that you can perform the following section of the tutorial in Windows PowerShell, or Windows Command Prompt (CMD). I would recommend using the Windows Command Prompt - as it is easier. PowerShell has a quirk where you must wrap Java properties with double quotes. For example, -Duser.home=client-home or -Xmx512m must be wrapped in quotes to produce "-Duser.home=client-home" or "-Xmx512m". This tutorial includes the wrapped Java properties, but they are a pain to add!
We now have the RuneLite launcher downloaded, validated using the hash value, and copied to the folder we created on our USB flash drive. The only thing left to do is determine a suitable method to run the RuneLite client. Since it is not installed, we cannot simply click a Start Menu entry, or Desktop icon to start the client. We need to run a command to execute the client. Usually, this is very easy, as illustrated by the following command that would usually be sufficient:
java.exe -jar RuneLite.jarAlas! It is not so straight-forward when using a portable solution. We want three things to happen when we run RuneLite:
- Use the portable version of the JRE we have previously installed to our USB flash drive
- Configure RuneLite to use the USB flash drive to store client configuration files (the
.runelitedirectory) - Configure RuneLite to use the USB flash drive to store and load the OSRS cache (the
jagexcachedirectory)
After some experimentation and testing - all of these requirements are possible. However, it is not an easy solution. Storing the RuneLite home folder (.runelite) on the USB drive was easy. However, the biggest problem was configuring RuneLite to store the OSRS cache (jagexcache) on the USB drive. So… how can we configure RuneLite to use a different home folder than the actual home folder for the current user? Usually, the home folder will be determined by Java system property. This means the home folder is determined by Java, not by RuneLite - so we can override this default setting. I had a quick browse of the RuneLite Launcher.java file, and found the following line:
System.getProperty("user.home")Basically, RuneLite is asking Java for the home directory of the user that is running RuneLite. We can actually modify the default value by telling Java we want a different home directory. This is a pretty simple process, and we can set it at runtime, so no permanent settings on the host system need to be made. We only need to modify the command we use to run RuneLite. Specifically, we can include a command option that is passed to the Java executable (java.exe) when running RuneLite. The option we need is:
-Duser.home=any/path/we/wantThe -D is a system property option - we are changing the user.home property to be any/path/we/want! So, based on our portable java.exe path, and the location of the RuneLite.java file… the full command we should use to run RuneLite is:
CommonFiles\Java\bin\java.exe "-Duser.home=client-home" -jar client-runelite/RuneLite.jarRemember, if you are using PowerShell (and not the Windows Command Prompt - cmd) to run RuneLite, then you must wrap the specified Java properties in double quotes. This is the -Duser.home=client-home part of the command. I would recommend using quotes to wrap this argument, as it will work in PowerShell and CMD. Thanks to user comments that pointed out this issue.
In the above example, take note that this command has been run in the root directory of the E: drive (the USB flash drive). We use a relative path to launch the Java executable (CommonFiles\Java\bin\java.exe), set a new home folder location (-Duser.home=client-home) to be the folder named client-home on our USB drive, then run the RuneLite launcher (-jar RuneLite.jar). Excellent! Well… no, not really. This works and achieves two of the requirements - numbers 1 and 2, but not 3. This method will still create/load the OSRS cache files from the normal users’ directory (e.g., C:\Users\PH01L\jagexcache). The user.home property works for the RuneLite configuration folder (the .runelite folder), but does not work for the OSRS cache folder (the jagexcache folder). So how can we solve this?
It seems that although we set the user.home value, this does not make it into the command the RuneLite launcher uses to run the actual client. So when the RuneLite client (not the launcher) downloads the OSRS cache, it puts it in the usual home folder location. If you are fine with creating the OSRS cache file in the home directory of your user account (e.g., C:\Users\PH01L\jagexcache), feel free to use the command above. If that is not ideal for you… continue reading!
This is likely one of the hackiest solutions I have come up with! When running the RuneLite launcher using the first command, I noticed something interesting in the output… I also found this information in the RuneLite launcher logs (in the .runelite\logs\launcher.log file). The last entry will document the command used to launch the RuneLite client. However, I think this entry is only created the first time you run the launcher (from my brief testing).
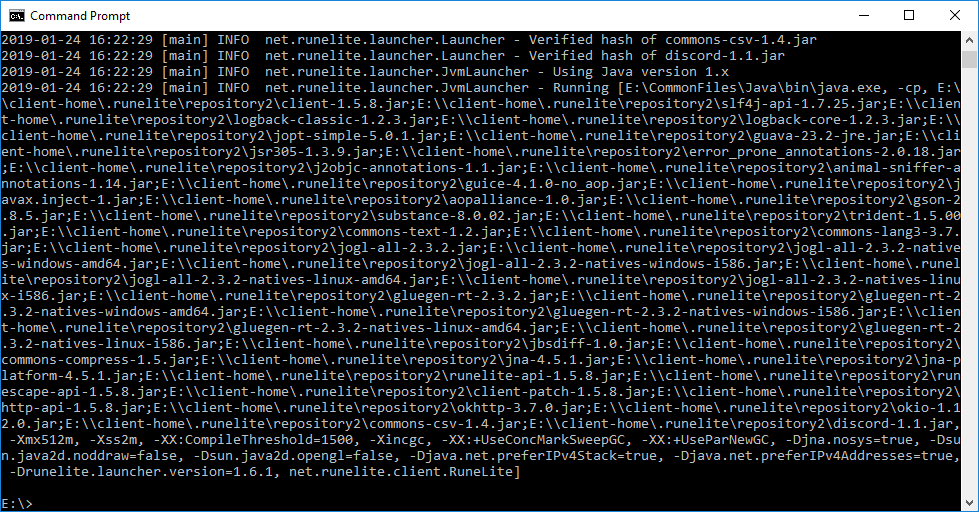
This last entry is an array of strings that are the command used to run the client. The command is rediculously long, mainly due to the inclusion of all the JAR dependencies in the classpath, as well as the plethora of JVM options added. I stitched the command together, and implemented a wildcard search for classpath inclusion, and ended up with the following monster command. This command will run and actually put the cache in the USB drive:
CommonFiles\Java\bin\java.exe -cp "client-runelite\RuneLite.jar;client-home\.runelite\repository2\*" ^
"-Duser.home=client-home" "-Xmx512m" "-Xss2m" "-XX:CompileThreshold=1500" "-Xincgc" "-XX:+UseConcMarkSweepGC" ^
"-XX:+UseParNewGC" "-Djna.nosys=true" "-Dsun.java2d.noddraw=false" "-Dsun.java2d.opengl=false" ^
"-Djava.net.preferIPv4Stack=true" "-Djava.net.preferIPv4Addresses=true" ^
"-Drunelite.launcher.version=1.6.1" net.runelite.client.RuneLite
Holy crap, right?! One key point before we discuss anything: This command requires you have run the RuneLite launcher at least once to download all the required JAR files to the RuneLite home folder (client-home\.runelite\repositories2\). This is because we need those files to actually launch the client. In future releases when the client is updated, you will have to run the launcher again to download the updated JAR dependency files. Another important note, the command above is using the caret symbol (^) to add line breaks to the command so that it is readable. You could remove these and put the command on one line if you wanted. So… a little summary of what is happening in the command above:
CommonFiles\Java\bin\java.exe: The relative path to the Java executable-cp "client-runelite\RuneLite.jar;client-home\.runelite\repository2\*": Set the classpath to have theRuneLite.jarfile from theclient-runelitefolder, as well as a wildcard inclusion of all RuneLite dependencies in theclient-home\.runelite\repository\folder (all the JAR file dependencies). Setting a wildcard here is probably not best practice, however, without it, we would have to update the command after every RuneLite update (every week).- Any option/argument starting with
-Dor-Xis an option passed to the Java executable. Note how I slipped in the-Duser.home=client-homevalue which sets the system property for the home directory to be theclient-homedirectory. All other options are specified in the command used to run the RuneLite client and configured by the RuneLite developers. net.runelite.client.RuneLite: The class to run the RuneLite client in the providedRuneLite.jarfile.
TL;DR: Yeah I know, this section is intense. The following commands document the essential steps:
- Change to the E:\ drive (or whatever letter your USB flash drive is)
cd /D E:- Start the RuneLite launcher to update any dependencies
CommonFiles\Java\bin\java.exe "-Duser.home=client-home" -jar client-runelite/RuneLite.jar- Run the RuneLite client
CommonFiles\Java\bin\java.exe -cp "client-runelite\RuneLite.jar;client-home\.runelite\repository2\*" "-Duser.home=client-home" "-Xmx512m" "-Xss2m" "-XX:CompileThreshold=1500" "-Xincgc" "-XX:+UseConcMarkSweepGC" "-XX:+UseParNewGC" "-Djna.nosys=true" "-Dsun.java2d.noddraw=false" "-Dsun.java2d.opengl=false" "-Djava.net.preferIPv4Stack=true" "-Djava.net.preferIPv4Addresses=true" "-Drunelite.launcher.version=1.6.1" net.runelite.client.RuneLiteThe third command (to run the RuneLite client) should be used for running RuneLite to play OSRS. The second command should be used to update RuneLite dependencies when the RuneLite client is updated (usually Thursdays). Also, if you are a little paranoid about making changes to the host computer, only perform the update on a computer you are willing to install the OSRS cache too. If you update the client and do not stop it quickly enough, it will continue to run the client and download the OSRS cache files.
RuneLite Dependency Cleanup
It is essential that this final step is followed when running the RuneLite client from the USB drive. When the game updates each week, this will usually create a number of new files in the client-runelite\.runelite\repository2\ folder. It is essential that you remove any previous versions of any of the dependencies. This will usually include the following five (5) files: client, client-patch, http-api, runelite-api and runescape-api files. If you are unsure what to delete, just delete all the files and run the launcher again to update the files.
Creating a Batch File to Update RuneLite
Those commands are a little intense, so I created a Windows Batch file to automate the process. The first batch script is to update the RuneLite client. In the root folder of your USB flash drive, create a new text file. This is easily achieved by right-clicking in Windows Explorer and selecting New, then Text Document. Rename the file to RuneLite_update.bat (make sure you have the Hide extensions for known file types turned off in the Folder Options for Windows - Google it!). Open the file in your favorite text editor and insert the following command.
CommonFiles\Java\bin\java.exe "-Duser.home=client-home" -jar client-runelite/RuneLite.jarYou can simply run the batch file (double click) to force RuneLite to update. I usually do this after every weekly RuneLite update.
Creating a Batch File to Start RuneLite
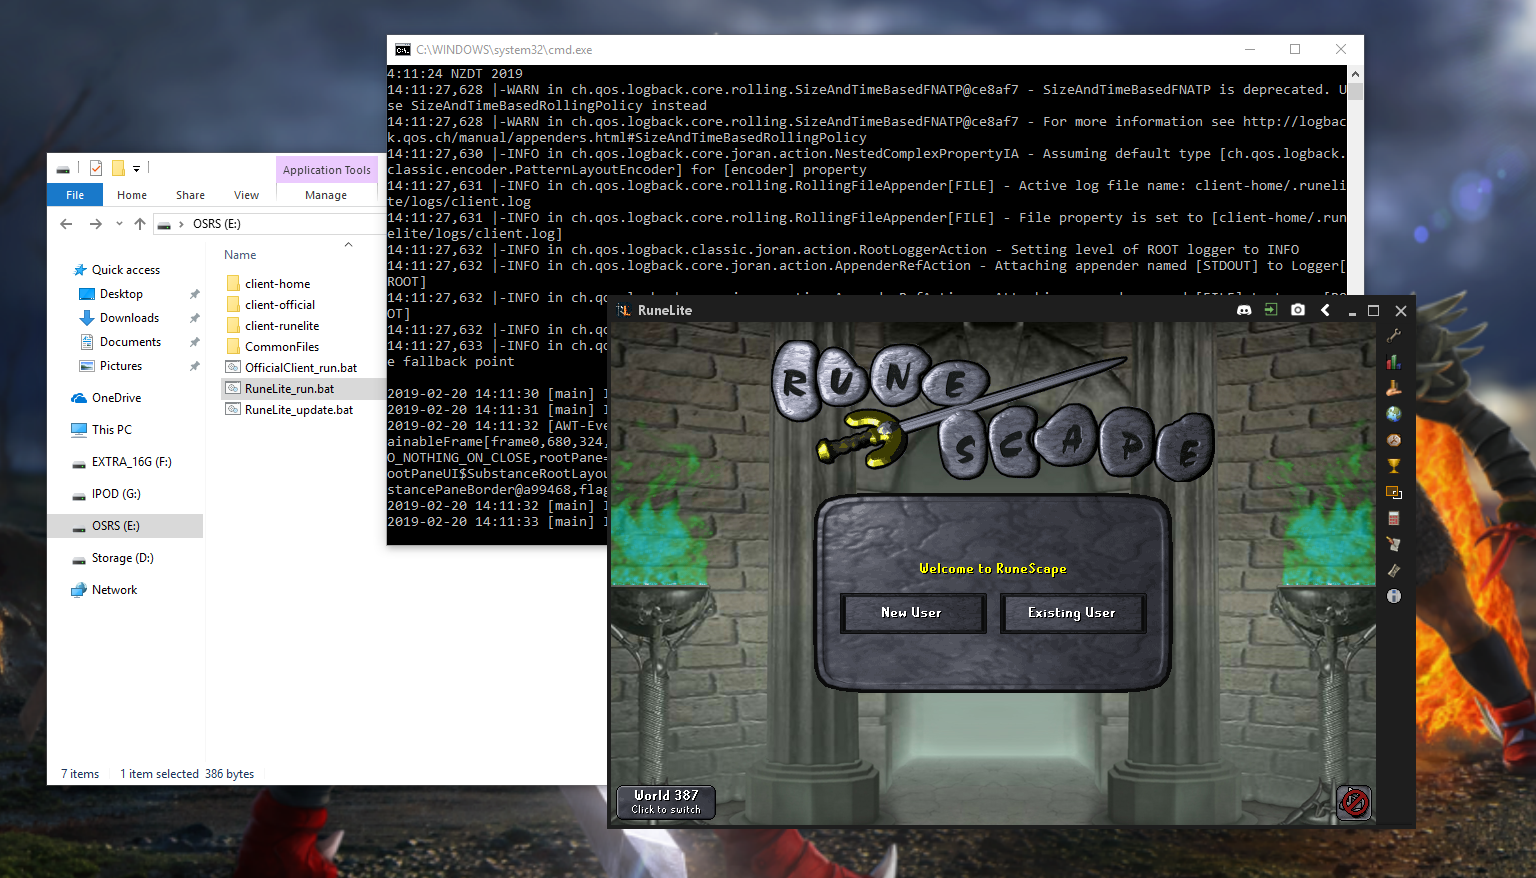
The second batch file will be used to run RuneLite. Perform the same steps to create a new file, but this time name it RuneLite_run.bat. Enter the following command.
CommonFiles\Java\bin\java.exe -cp "client-runelite\RuneLite.jar;client-home\.runelite\repository2\*" "-Duser.home=client-home" "-Xmx512m" "-Xss2m" "-XX:CompileThreshold=1500" "-Xincgc" "-XX:+UseConcMarkSweepGC" "-XX:+UseParNewGC" "-Djna.nosys=true" "-Dsun.java2d.noddraw=false" "-Dsun.java2d.opengl=false" "-Djava.net.preferIPv4Stack=true" "-Djava.net.preferIPv4Addresses=true" "-Drunelite.launcher.version=1.6.1" net.runelite.client.RuneLiteAgain, you can double click this batch file to run it using the Windows Command Prompt. One quick note, if you download a new version of the launcher in the future, you may need to change the -Drunelite.launcher.version=1.6.1 entry to the new version number. Additionally, you may need to update the command to launch RuneLite if the developers include or exclude any of the command line options/arguments I have witnessed in version 1.6.1 of the launcher. Below is an example of when I run the RuneLite_run.bat batch script from my USB drive (wallpaper art courtesy of RS-LegendArts).
Using the Official OSRS Client
The previous section discussed setting up and running the RuneLite client from a USB flash drive. The method got a little confusing due to having to run the RuneLite launcher to update the client, then running the actual client. After setting up the official OSRS client to run from a USB flash drive - I found that it was much simpler! Well, kind of! It is simple… depending on the method you use to download the official OSRS client and the command options used to run the client.
Download the Official OSRS Client JAR File
I have previously written a tutorial entitled Installing the Official OSRS Client on Ubuntu Linux. In that post, there is a section called Getting the JaGeX Applet Viewer. To sum it up quickly, the JaGeX Applet Viewer is the executable JAR file provided with the OSRS Windows client that is used to run the game. You can download this file directly, but it will contain a copyright bar - which is kind of annoying during gameplay. Or you can extract the file from the Windows installer, which will have no copyright bar. In this tutorial, I will use the simple method of downloading the file directly. If you want a version of the official client without the copyright bar… read the Getting the JaGeX Applet Viewer section.
You can download the JaGeX Applet Viewer directly from the official website. We also want to download the official client icon image (in PNG format). So, start by downloading both of these files using the links below:
Now you can copy the jagexappletviewer.jar and jagexappletviewer.png files to your USB flash drive. Based on the folder structure I configured earlier, I will save the file in the client-official directory. In my case, I copied it to the following location (where E: is the drive letter of my USB flash drive):
E:\client-official\jagexappletviewer.jar
E:\client-official\jagexappletviewer.png
Running the Official OSRS Client JAR File
Now that we have the JaGeX Applet Viewer program downloaded and placed on our USB flash drive we need to run the client. Similar to how we configured RuneLite, the official client can be run with Java by specifying a command with Java options and arguments. The following example is the minimal command needed to run the client - you cannot use the usual java -jar file-name.jar syntax when running this client!
CommonFiles\Java\bin\java.exe -Duser.home=client-home -Djava.class.path=client-official\jagexappletviewer.jar -Dcom.jagex.config=http://oldschool.runescape.com/jav_config.ws jagexappletviewer client-officialOnce again, we have quite a complex command to run the client. The list below breaks down the command and the required arguments.
CommonFiles\Java\bin\java.exe: Call the Java executable that is installed on our USB flash drive-Duser.home=client-home: Set the directory to store the required client files, including the preferences and the cache. In this example, we use theclient-homefolder that is located in the root of the flash drive.-Djava.class.path=client-official\jagexappletviewer.jar: The name and location of the class/program we want to run. In this case, it is thejagexappletviewer.jarfile we extracted and stored in theclient-officialdirectory.-Dcom.jagex.config=http://oldschool.runescape.com/jav_config.ws: To run the client we MUST specify the config file. The client will not run without this argument. You can load the URL up in a web browser to see the contents of this file - it is pretty interesting!jagexappletviewer: The name of the class that we are requesting to load when starting the client. This must be set tojagexapplexviewer, or the client will not run.client-official: Specify a folder for the client to look for an icon with the file name ofjagexappletviewer.png. Since the client looks for a specific file name, we just need to set the directory to look for the icon (we saved the icon file in theclient-officialfolder in the previous section).
In addition to this base command, we could add in a variety of additional arguments to increase performance. Please see the Running the JaGeX Applet Viewer: Commands section if you want more information on additional command line arguments - as I have discussed these in depth in my other post.
Creating a Batch File to Start the Official OSRS Client
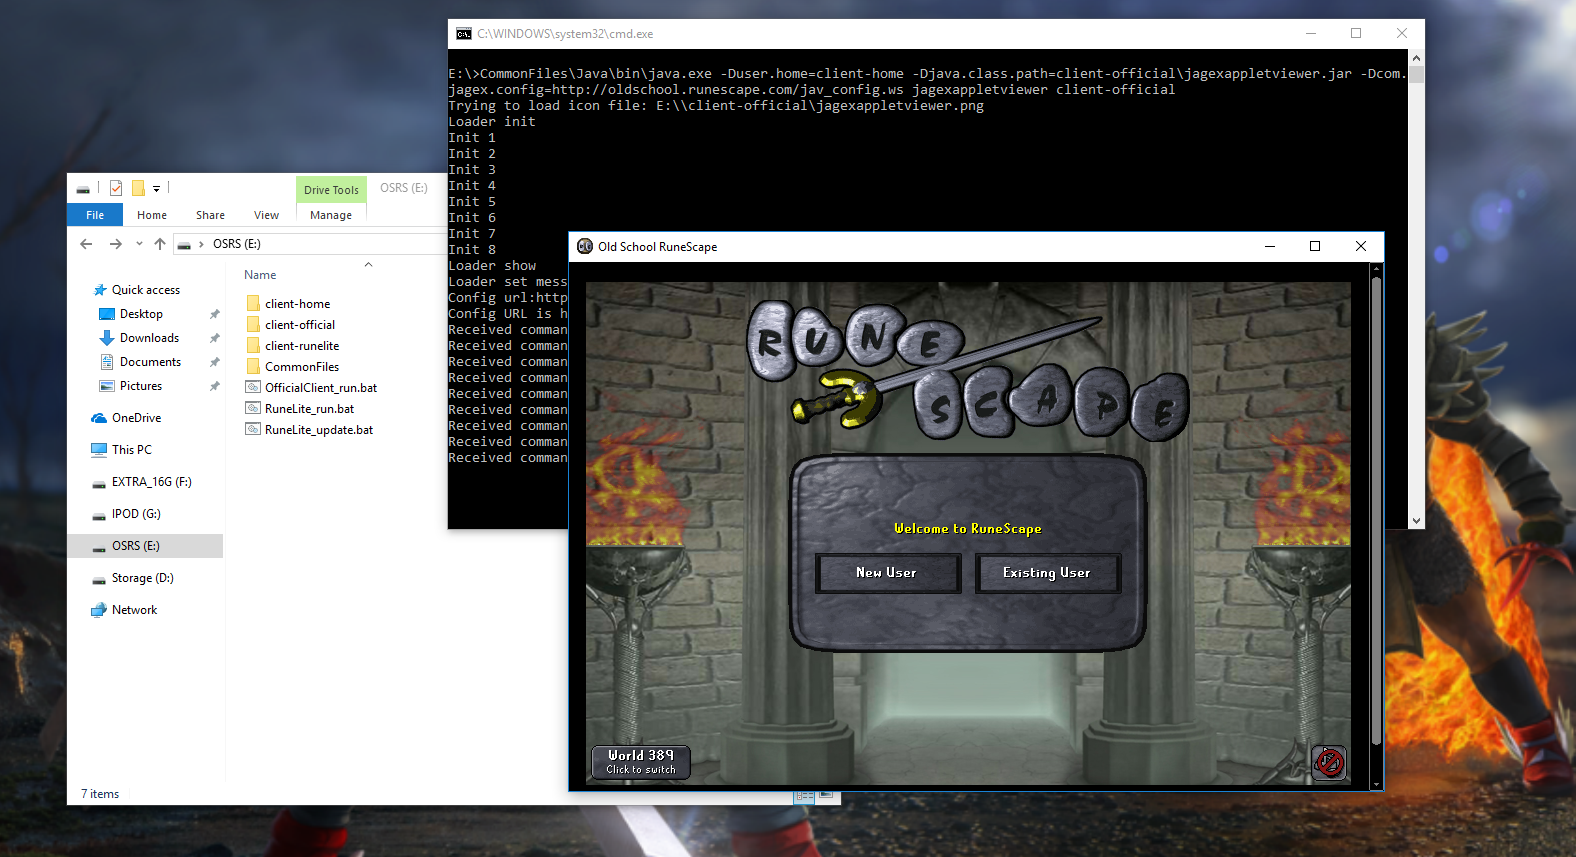
To run the official client from our USB setup, it would be much more beneficial to have a script to start the client. Writing out the long command every time we want to play OSRS would be a major headache. Luckily, the method to start the client is really simple when using a Windows Batch file to automate the process. In the root folder of your USB flash drive, create a new text file. This is easily achieved by right-clicking in Windows Explorer and selecting New, then Text Document. Rename the file to OfficialClient_start.bat (make sure you have the Hide extensions for known file types turned off in the Folder Options for Windows - Google it!). Open the file in your favorite text editor and insert the following command.
CommonFiles\Java\bin\java.exe -Duser.home=client-home -Djava.class.path=client-official\jagexappletviewer.jar -Dcom.jagex.config=http://oldschool.runescape.com/jav_config.ws jagexappletviewer client-officialYou can double click this batch file to run it using the Windows Command Prompt. Below is an example of when I run the OfficialClient_start.bat batch script from my USB drive (wallpaper art courtesy of RS-LegendArts).
Conclusion
This was quite the adventure. We covered how to install a portable version of Java on a USB flash drive, then how to download, run and script the RuneLite and official clients! And we ended up with a method to have a full functionality OSRS client on a USB flash drive without the need to install software (Java or OSRS client) on a host computer system. Furthermore, we also found a way to not download and store the OSRS cache in the usual place (the home folder of the user).
As per usual, I hope you enjoyed this post. And if you have any questions, clarifications or feedback - make sure to leave a comment below. Until next time, happy scaping everyone!